When I wrote my book Suddenly Frugal: How to Live Happier and Healthier for Less, I included a section on composting for beginners. How does composting jibe with frugality? Well, it can be a money saver for you.

How composting saves money
For example, at the time I wrote the book, we lived in a place where we had to pay for trash pickup. We had a choice of twice a week, weekly or biweekly trash pickup. Not surprisingly, the more often the garbage truck came, the more we paid. However, once we started composting, we only needed trash pickup every other week.
Fast forward to now and we live in a Maine town with a pay-as-you-throw garbage policy. As Kennebunk residents, we are required to purchase trash bags at local stores. Then, when we put our barrels out on trash day, the garbage must be in either purple or blue bags. If not, you risk a fine.
While there is no getting around having to pay as we throw away our garbage via curbside pickup or even taking it to the transfer station, we can cut down on how much we throw away in the garbage. And, you guessed it, that’s because we compost regularly. Usually, we’ll only need to roll our garbage can out to the curb twice a month for pickup. So, over time, this saves us money on having to buy bags.
Home composting for beginners
Have I got your attention or inspired you to begin composting as a way to save money? I thought so. It really is worth the time and effort you need to compost right. That’s why I’ve decided to put together this composting for beginners article.
Why compost? Well, besides saving money, you’re also helping to save the Earth by diverting food waste out of landfills. Also, compost eventually becomes nutrient-rich soil that you can use — for free — in your garden.
Note: I realize that it’s easier to start composting at home when you own your home or live in a place with a yard. Composting isn’t as easy when you live in an apartment or a condominium community that doesn’t allow it. However, some Maine towns do offer composting at the transfer station. It isn’t free, unfortunately.
First steps for starting to compost at home
It’s important to understand that not every kind of food from your kitchen belongs in the compost. Primarily, you want to compost organic, non-animal matter. This includes vegetables and fruits — and their peels — along with coffee grounds, coffee filters and more. You can even compost your pumpkins after Halloween.
The one exception to the non-animal matter is egg shells. Other than that, you’re not supposed to put any dairy, meat, bones or fats in your compost. I was always told that this was more about keeping animals at bay and making sure your compost doesn’t smell rotten as it decomposes. Also, as these items rot, they can become diseased and that’s not safe for anyone.
Finally, you can put these non-kitchen items in a compost, because they break down easily into organic matter:
- tissues
- paper towels
- coffee filters
- shredded paper
- hair
- dryer lint
- shredded newspaper — if you still get one delivered
Composting containers
To get started, you’ll need a composting container to keep inside the house — to collect scraps — and then one you’ll keep outside. This is where you’ll dump your food waste.
You can use any bucket or container you’d like in your kitchen. I just recommend that you find something with a top to cut down on odors or fruit flies.

If you’ve ever bought a large tub of store-brand ice cream, the kind that’s plastic and has a top and a handle, those are great to reuse as compost collectors indoors for kitchen scraps. You can run them through the dishwasher, and they’re small enough to keep on your countertop or under the sink.
Outdoor composters
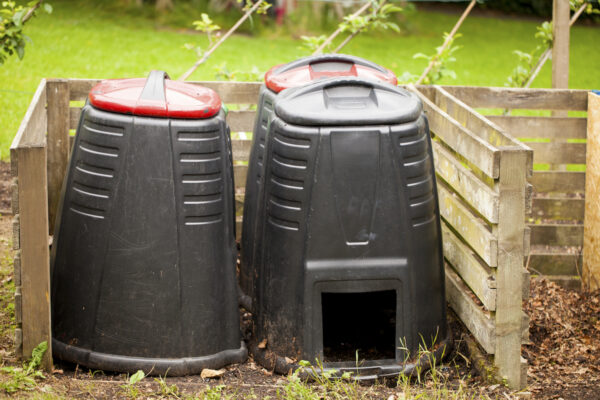
For outside, you have a few composting options. You can get something called a beehive compost bin. In my old house, we got one off Freecycle, from someone who had taken a composting class at their local community college. When we moved, we left it behind.

Similar to the beehive is a pyramid shape composter. With both of these shapes, you put the compost material on the top. Then, when you’re ready to take out the compost-turned-soil, you slide up a door on the bottom and use a pitchfork to take out the organic material.
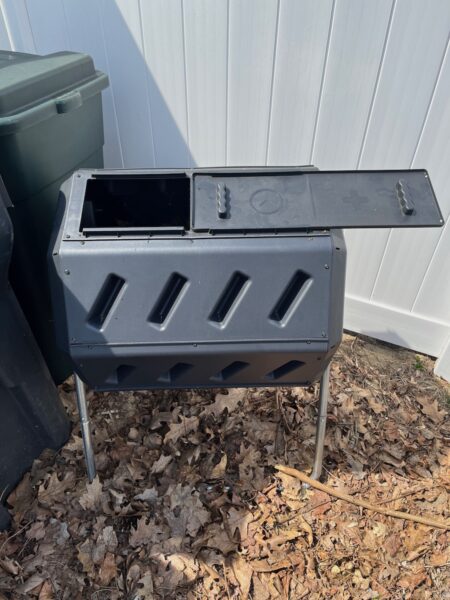
Another option is to purchase something called a compost tumbler. We got our compost tumbler on Amazon. It required some assembly. What I like best is that I can move it around, as I do when composting in the winter. During those cold weather months, I’ll move it to be in the sun. During the summer, I want it only partially in the sun.
What I do not love is the tumbler’s design. That is, when I’m ready to take out the compost to use in my garden, my only option is to spin it so that the door is at the bottom. Then, once I slide the door open, gravity takes over and I cannot control how much comes out.
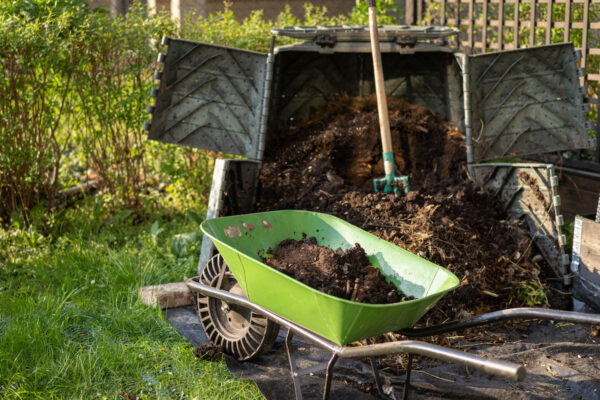
Also, the doors are double wide yet low to the ground. So, too low to get a wheelbarrow underneath so I need to use a large, rectangular Rubbermaid bin to catch the compost as it falls out. Then, I have to drag it to where I need to use the compost in my garden. Definitely not convenient.
DIY composter
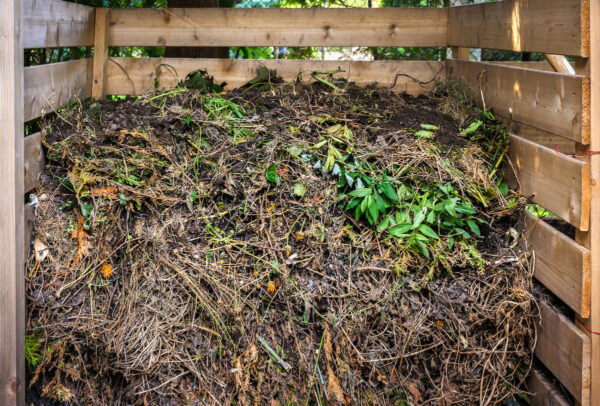
Finally, you can make your own compost pile, if you have the yard space to do it and you’re handy. You’ll need three wooden palettes that you’ll screw together to make an open air, three-sided compost bin. I would look on your local Buy Nothing Group or Facebook Marketplace for people giving away palettes.

Beginners guide on how to compost
Now that you’ve got all of your composting containers set up, let me explain how to compost. That is, how you handle putting things in your outside compost bin. This is composting at its most basic for beginners.
Three steps to composting
Basically, composting is a three-step process. One, you bring out your inside bucket to dump in the compost bin. Two, you need to cover that organic material with something “brown.” This could be soil, grass clippings or dried leaves. I tend to use the leaves since they are plentiful and free in my yard. Three, you want to rotate, mix or turn your compost on a regular basis to help the decomposition process.
The idea behind the steps is balancing out the moisture level of your compost and moving air around. If it stays too wet, it won’t break down nicely. Thus, the added brown things help to dry things out. Sometimes, though, if I don’t have leaves handy, I will use the paper from my crosscut shredder to balance the wet and dry in the composter.
Finally, I always spin or mix the compost before putting the top back on. This aerates what’s inside the compost bin, which helps to speed up the decomposition process.
Placement of your compost bin
As I mentioned earlier, the sun’s heat plays a part in helping your compost to break down into soil. However, in the sun, a compost that gets too hot can smell. So, in spring and summer, I recommend keeping the bin somewhere that gets partial shade.
On the other hand, in the winter, you’ll want the compost to get as much sun as possible. With the colder air temperatures, the compost is breaking down but slowly. Again, this is why I like the tumbler composter. I can move it around based on time of the year.
If you go with a more permanent compost bin or pile, then definitely set it up in a partially shady spot in spring or summer. Make sure it is under trees that lose their leaves so it can get full sun in the fall and winter.
Using the soil that your compost made
As I mentioned earlier, your compost bin will eventually give you nutrient-rich soil that you can use in your garden. You’ll know that it is time to harvest that soil when you see more dirt than food scraps.
Also, taking soil isn’t an all or nothing thing. You may find that only about 25 percent of your compost is ready to go into the garden. So take what you need and let the rest continue to decompose.
At the same time, harvesting soil doesn’t have to be a perfect science either. There have been many times when I was transplanting things in my garden and grabbed soil from my composter that wasn’t 100 percent decomposed. Sure, there might have been a few apple cores or egg shells still in the soil. Nonetheless, it still did its job of giving my new plants the nutrients they needed to transplant well.
Finally, if you ever want to create a new garden bed without digging anything, you can use the compost to make something called a lasagna garden.
Here are tips on how to compost in winter.
Final thoughts on composting at home
The one kind of composting we’ve never tried is worm composting. Maybe we’ll eventually add it to our repertoire. If you do use worms to compost, I’d love to hear from you.
Also, if you have additional tips for beginners who want to get started on composting — or you think I’ve missed covering something in this article — do let us know.
Free and Cheap Things To Do in Southern Maine This Week
Here are FREE and cheap things to do in Southern Maine in the coming week.
